

 by
by Ad Inserter WordPress Plugin: An In-Depth Guide
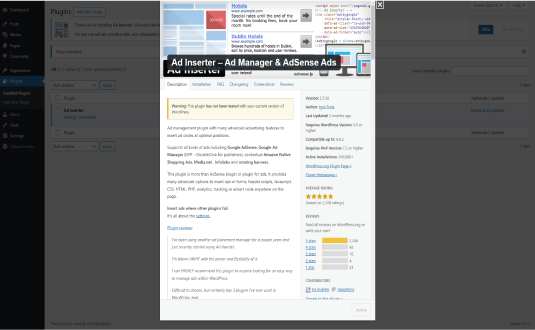
The Ad Inserter plugin for WordPress is a versatile tool for managing and inserting ads into a website. Designed to work seamlessly with a range of ad networks, including Google AdSense, Amazon Native Shopping Ads, Media.net, and custom HTML, Ad Inserter enables WordPress users to optimize ad placements without complex coding. This plugin is favored by bloggers, affiliate marketers, and business owners because of its ease of use, flexibility, and advanced options that make it suitable for beginners and experienced webmasters alike.
In this guide, we’ll dive into the features, setup, and best practices for using the Ad Inserter plugin, as well as some advanced techniques for maximizing revenue and enhancing user experience.
1. Introduction to Ad Inserter
Ad Inserter is a popular ad management plugin that simplifies ad placement on WordPress websites. With over 200,000 active installations and a high user rating, it’s one of the most reliable solutions for managing ads on WordPress sites. Ad Inserter allows users to insert ads at various locations on a page, such as before or after post content, within paragraphs, in widgets, or even after specific HTML elements.
The plugin comes with a free version offering basic functionality and a Pro version with more advanced features, such as A/B testing, geotargeting, and ad rotation. Ad Inserter’s code block approach gives users total control over where and how ads appear, allowing them to maximize engagement and ad revenue.
2. Key Features of Ad Inserter
Ad Inserter includes a broad range of features designed to simplify ad management and optimize placements. Here are some of the key features that make it a popular choice among WordPress users:
a. Flexible Ad Placement
Ad Inserter allows users to place ads nearly anywhere on a page. This includes specific points within the post content, such as before the first paragraph, between paragraphs, or after the post. Ads can also be placed in sidebars, footers, headers, and other widgetized areas.
- Automatic Placement: Users can configure ads to automatically insert in specific areas, like at the beginning or end of posts, between specific paragraphs, or after images.
- Manual Placement with Shortcodes: For precise placement, the plugin offers shortcodes that allow users to insert ads wherever they want within content.
- Widget Placement: Ads can be placed in sidebars or footers using Ad Inserter widgets.
b. Support for Multiple Ad Networks
Ad Inserter is compatible with various ad networks, including Google AdSense, Media.net, and affiliate marketing networks. This flexibility allows users to mix and match different types of ads to diversify revenue streams.
- Custom HTML and JavaScript: Besides network ads, users can insert custom HTML, JavaScript, or PHP code, making it easy to use the plugin with virtually any ad format.
- Amazon Native Shopping Ads: Ad Inserter supports Amazon ads, making it an ideal choice for affiliate marketers promoting products through the Amazon Associates Program.
c. Ad Rotation and A/B Testing
To prevent ad fatigue and improve user experience, Ad Inserter allows users to rotate multiple ads in the same location. This feature is particularly useful for testing different ad formats or creatives to see which perform better.
- Ad Rotation: By rotating ads, users can display multiple ads in a single placement, which can improve engagement.
- A/B Testing: The Pro version includes A/B testing, allowing users to experiment with different ads or placements to optimize click-through rates and revenue.
d. Geotargeting and Device Targeting
Ad Inserter Pro offers advanced targeting options, such as geotargeting and device targeting, so that ads are only shown to relevant audiences. This is ideal for users running campaigns targeted to specific locations or for those who want to differentiate ads for mobile and desktop users.
- Geotargeting: Display ads based on the visitor’s location, which is helpful for running region-specific campaigns.
- Device Targeting: Differentiate ads for mobile, tablet, and desktop devices to ensure optimal viewing on any screen size.
e. Customizable Ad Blocks
The plugin allows users to create multiple ad blocks and assign different settings to each. This provides control over where each ad is placed, how often it appears, and who sees it. Users can create up to 16 ad blocks in the free version, while the Pro version offers up to 64 blocks.
- Conditional Display: Ad Inserter allows users to show or hide ads based on specific conditions, like post type, category, or tags.
- Custom CSS Styling: Users can apply custom CSS styles to each ad block, enabling them to align ads with the site’s design.
f. Code Injection for Advanced Users
Advanced users can take advantage of Ad Inserter’s ability to inject custom code (HTML, JavaScript, PHP) into pages. This is useful for adding tracking codes, pop-ups, or even additional ad formats that go beyond standard banner ads.
3. How to Set Up and Use Ad Inserter
Setting up Ad Inserter on a WordPress website is straightforward, making it accessible for beginners and advanced users alike. Here’s a step-by-step guide to get started:
Step 1: Install and Activate the Plugin
To install Ad Inserter, go to the WordPress dashboard, navigate to Plugins > Add New, and search for “Ad Inserter.” Click “Install” and then “Activate.”
Step 2: Configure Ad Blocks
After activation, you’ll find an “Ad Inserter” menu in the WordPress dashboard. Go to Settings > Ad Inserter to configure your ad blocks. Each block allows you to insert HTML, JavaScript, or ad code.
Step 3: Select Ad Placement Options
For each ad block, Ad Inserter provides various placement options. You can place ads:
- Before/After Content: Display ads at the start or end of the post or page.
- In Content: Insert ads within post content at specific intervals, such as after the first paragraph.
- Custom HTML Elements: Place ads after specific HTML elements like headers or images.
Step 4: Customize Targeting and Display Settings
Configure each ad block’s targeting settings, such as choosing specific post types, categories, tags, or user roles. For Ad Inserter Pro users, additional options like geotargeting and device targeting can be configured.
Step 5: Preview and Test Ads
After setting up, preview your site to ensure that ads are displaying correctly. Ad Inserter allows users to test different placements and rotate ads for better performance, making it easy to experiment with various layouts.
4. Benefits of Using Ad Inserter
Ad Inserter offers several benefits that make it a popular choice among WordPress site owners:
a. Optimized Ad Revenue
By allowing users to target, rotate, and schedule ads, Ad Inserter maximizes ad exposure and relevance. This can help improve click-through rates and increase ad revenue.
b. Enhanced User Experience
With options to control ad placements and display conditions, Ad Inserter enables a better user experience by preventing ads from appearing too frequently or in intrusive locations.
c. Simplified Ad Management
Ad Inserter’s intuitive block system makes managing multiple ads easy, even for users with limited technical knowledge. All ad management settings are accessible within the WordPress dashboard.
d. Compatibility with Any Ad Format
Whether you’re using AdSense, affiliate banners, or custom ads, Ad Inserter is compatible with virtually any ad format, providing flexibility and control.
5. Ideal Use Cases and Best Practices
Ad Inserter is ideal for several types of websites, including:
- Bloggers and Content Creators: Place ads within articles to maximize engagement without disrupting the flow of content.
- Affiliate Marketers: Use custom HTML to display affiliate banners or links and take advantage of rotation and targeting features for better results.
- Local Businesses: Leverage geotargeting to run campaigns targeting specific regions or locations.
6. Advanced Features in Ad Inserter Pro
The Pro version of Ad Inserter unlocks several advanced features:
- A/B Testing: Test different ad formats, placements, and creatives to determine which combinations perform best.
- Geotargeting: Show ads to users based on their geographical location, ideal for region-specific campaigns.
- Sticky Ads: Create sticky ads that remain visible as users scroll through content, increasing ad visibility.
7. Common Challenges and Solutions
While Ad Inserter is powerful, some users may encounter common challenges:
- Overlapping Ads: Avoid placing ads too close together within content, as this can create a cluttered experience.
- Ad Blocking: Some users may use ad blockers, reducing visibility. To counteract this, Ad Inserter Pro offers ad-blocking detection.
- Testing and Monitoring: Use Ad Inserter’s A/B testing feature and tracking tools to monitor ad performance and make adjustments as needed.
8. Alternatives to Ad Inserter
There are other WordPress plugins for ad management, but few offer the flexibility of Ad Inserter. Here are a few alternatives:
- Advanced Ads: A similar plugin with powerful targeting options, especially popular for AdSense users.
- WP In Post Ads: Focuses on in-content ad placements, allowing ads to be automatically inserted within posts.
- Ads Pro Plugin: A premium plugin with extensive ad management features and targeting options, aimed at larger websites.
9. Conclusion
Ad Inserter is a robust and flexible ad management solution for WordPress, allowing users to optimize ad placements, increase revenue, and improve the user experience. With its powerful targeting, rotation, and scheduling options, it’s suitable for any WordPress user looking to monetize their site through ads. Whether


Hello.
Good cheer to all on this beautiful day!!!!!
Good luck 🙂