by
by 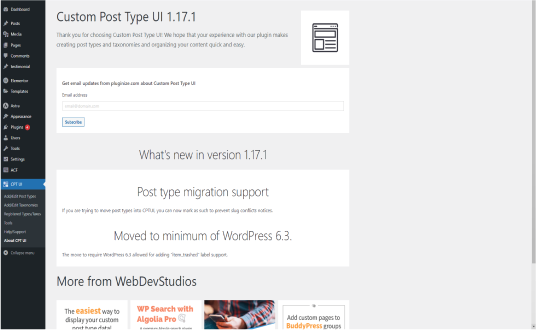
Custom Post Type UI WordPress Plugin: An Overview
WordPress is an incredibly versatile content management system (CMS) that allows users to create a variety of content types beyond just standard posts and pages. One of the most powerful features of WordPress is its ability to create Custom Post Types (CPTs). These allow you to tailor your content structure to fit the specific needs of your website. The Custom Post Type UI (CPT UI) plugin simplifies the process of creating and managing these custom post types.
What is Custom Post Type UI?
Custom Post Type UI is a user-friendly plugin that allows you to easily register and manage custom post types and taxonomies in WordPress without writing any code. This makes it accessible for users who may not be comfortable with PHP or the intricacies of WordPress’s core functionalities.
Key Features
- User-Friendly Interface: The plugin provides a straightforward interface where users can create, edit, and manage custom post types and taxonomies. It removes the need to modify theme files or work with code.
- Custom Taxonomies: In addition to custom post types, CPT UI allows users to create custom taxonomies, which are essentially groups that help organize content (similar to categories and tags).
- Settings Management: Users can easily configure various settings for each post type, including labels, visibility, supports, and rewrite rules, through a simple form interface.
- Export/Import Options: The plugin provides functionality to export and import CPT configurations, making it easy to migrate settings between different sites or backup configurations.
- Compatibility: CPT UI is compatible with other popular WordPress plugins, like Advanced Custom Fields (ACF), allowing for extended functionality when adding custom fields to your CPTs.
Why Use Custom Post Types?
Custom post types are essential for websites that require specific content organization. For example:
- Portfolios: Artists, photographers, and designers can create a portfolio post type to showcase their work separately from standard blog posts.
- Products: E-commerce sites often use custom post types for managing products, allowing for specific fields and taxonomies (like product categories).
- Events: Websites that host events can create an event post type to manage event details, ticket sales, and schedules.
- Testimonials: Businesses can create a custom post type for customer testimonials, making it easier to manage and display them effectively.
How to Install and Use Custom Post Type UI
- Installation:
- Go to your WordPress admin panel.
- Navigate to Plugins > Add New.
- Search for “Custom Post Type UI.”
- Click Install Now and then Activate.
- Creating a Custom Post Type:
- Once activated, you will see a new menu item labeled “CPT UI” in your WordPress dashboard.
- Click on Add/Edit Post Types.
- Fill in the necessary fields, such as Post Type Slug, Plural Label, and Singular Label.
- Configure additional settings like whether to use the editor, featured image, and custom fields.
- Click Add Post Type to create it.
- Creating Custom Taxonomies:
- Navigate to Add/Edit Taxonomies under the CPT UI menu.
- Similar to creating post types, fill in the necessary details like Taxonomy Slug, Plural Label, and Singular Label.
- You can associate the taxonomy with your custom post type here.
- Click Add Taxonomy to save.
- Using Custom Post Types:
- After creating a custom post type, you’ll see it appear in your WordPress dashboard as a new menu item.
- You can now add new entries to this post type just like you would with regular posts.
- Displaying Custom Post Types on Your Site:
- You may need to modify your theme’s template files to display your custom post types. This might involve creating a custom archive.php or single.php file for the new post type.
- You can also use shortcodes or page builders that support CPTs to display your content.
Tips for Using Custom Post Type UI
- Plan Your Structure: Before creating custom post types, consider how you want to structure your content. Identify which types of content need to be separated from regular posts and pages.
- Leverage Custom Fields: Combine CPT UI with custom fields plugins like ACF to enhance your post types with additional data. This allows for greater flexibility in how you manage and display content.
- Permalinks and Rewrite Rules: Pay attention to permalink settings for your custom post types to ensure SEO-friendly URLs. CPT UI provides options to configure rewrite rules during setup.
- Taxonomy Management: Use custom taxonomies effectively to group and filter your custom post types. This makes it easier for users to find related content on your site.
Common Use Cases
- Real Estate Listings: Create a custom post type for property listings that includes custom fields for price, location, and amenities.
- Recipes: A food blog can have a custom post type for recipes, with fields for ingredients, cooking time, and dietary information.
- Team Members: Businesses can create a custom post type for team members to display bios, roles, and contact information.
- FAQs: A custom post type for frequently asked questions can help organize and display useful information for users.
Conclusion
The Custom Post Type UI plugin is an invaluable tool for WordPress users looking to expand their site’s content management capabilities. By providing an easy-to-use interface for creating and managing custom post types and taxonomies, CPT UI enables users to tailor their content structure without needing coding knowledge. Whether you’re building an eCommerce site, a portfolio, or a blog with diverse content, this plugin can help you organize and display your information effectively.
By leveraging the power of custom post types, you can enhance the functionality of your WordPress site, improve user experience, and create a more organized content structure. Start exploring the possibilities with Custom Post Type UI and take your WordPress site to the next level!